


Table of Contents
- Why Gallery Walls Fail (and What Proper Hanging Actually Means)
- How to Measure for a Gallery Wall: The Math That Saves Your Walls
- Gallery Wall Spacing Rules That Keep Every Frame Aligned
- Best Tools for Hanging Pictures: What You Actually Need
- Wall Types, Weight Limits, and Safe Hardware Selection
- Hanging Gallery Walls in Difficult Spaces: Stairs, Corners, and Small Apartments
- Troubleshooting and Correcting Common Hanging Mistakes
- Conclusion: A Calm Wall Starts with a Careful Plan
- Frequently Asked Questions
Last Updated: October 6, 2026
Why Gallery Walls Fail (and What Proper Hanging Actually Means)
Most gallery walls fail before the first nail goes in. The holes are fine. The planning is not.
Learning how to hang gallery walls properly starts with one idea: a gallery wall is a single composition made of many frames, not a collection of individual pictures.
The failures are almost never about taste, they are about math and hardware.
How to Measure for a Gallery Wall: The Math That Saves Your Walls
Measure the full wall space first, then subtract your margins before choosing a frame. Leave 15-25 cm of clear wall on each side so the group has room to breathe.
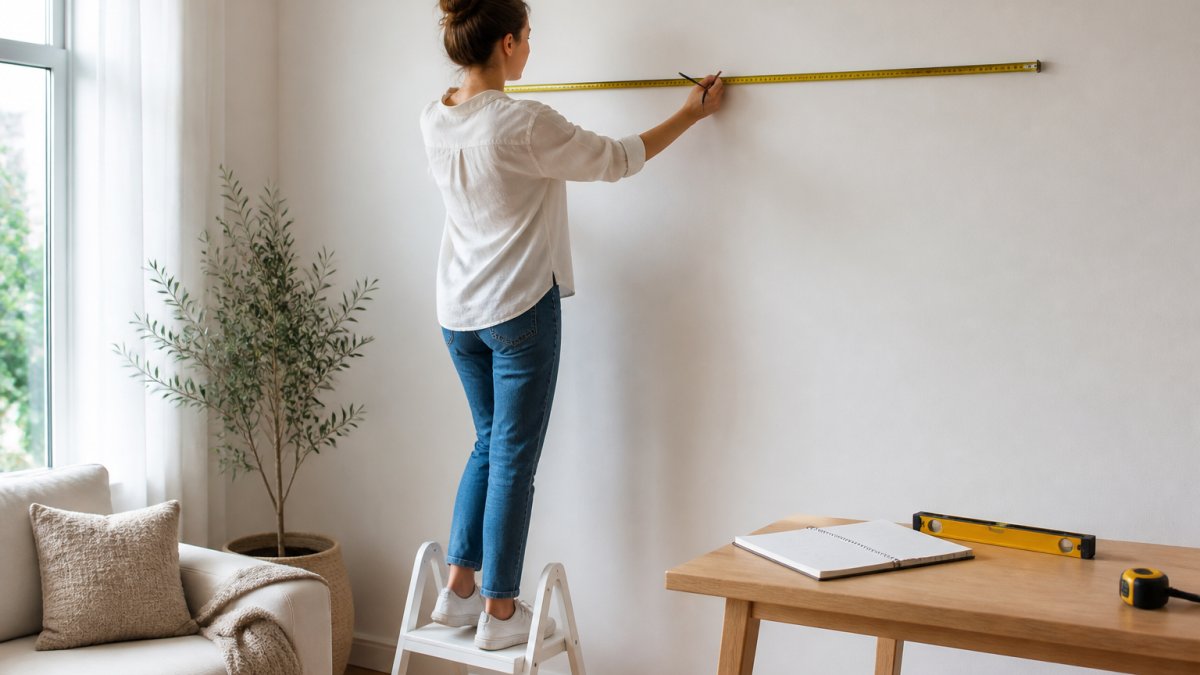
Calculating Center Point and Eye Level
The centre point should sit at eye level for the average adult, commonly 145-150 cm from the floor. For a group of frames, measure the total height, divide it in two, and mark that midpoint at eye level, that mark anchors everything else.
Sizing the Layout to a Sofa, Bed, or Console
A gallery wall above furniture should be no wider than the furniture below it. Aim for 60-75% of the sofa or console width, with 15-25 cm of clearance between the furniture top and the lowest frame. Too wide looks top-heavy; too narrow strands the furniture.
Gallery Wall Spacing Rules That Keep Every Frame Aligned
Consistent spacing separates a deliberate gallery wall from a random cluster. The usual rule is 5-8 cm between frames, applied everywhere.
Even Spacing vs. Optical Spacing
Even spacing means the literal gap is identical between every frame. Optical spacing adjusts gaps slightly so the arrangement looks even to the eye, useful when frames differ in size or have thick mouldings. Use even spacing for symmetrical layouts, optical spacing for eclectic ones with mixed frame sizes.
Anchoring with a Focal Point and Balancing Frame Sizes
Every gallery wall needs one anchor piece, typically the largest frame, placed first slightly off-centre or at the visual centre. Build smaller frames around it, pairing a heavy piece on one side with two lighter pieces on the other rather than stacking all the weight in one corner.

| Layout Type | Best For | Spacing Approach | Anchor Piece |
|---|---|---|---|
| Symmetrical grid | Hallways, above a bed | Even spacing, 5-8 cm | Centre frame |
| Eclectic cluster | Living rooms, stairwells | Optical spacing | Largest frame |
| Salon-style | Tall walls, home offices | Tight, 3-5 cm | None required |
| Single-row | Above a console or sofa | Even spacing | None required |
Best Tools for Hanging Pictures: What You Actually Need
You need fewer tools than most lists suggest. A measuring tape, spirit level, pencil, painter's tape, and paper templates cover almost every gallery wall; add a stud finder for anything heavier than a small frame.
The paper template method is the one most people skip and later regret. Cut paper to each frame's exact size, tape the templates to the wall, and move them until the arrangement works.
Wall Types, Weight Limits, and Safe Hardware Selection
Hardware choice depends on two things: the frame's weight and the material behind the plaster. Get it wrong and a frame comes down, often taking wall finish with it. Here is a repeatable weight method.
Step 1: Weigh the frame, not the artwork
A frame's hanging load is the glass, moulding, backing board, and art itself. A 40 × 50 cm frame with glass weighs roughly 2-3 kg; a 70 × 100 cm frame with glass can exceed 6-8 kg. Weigh the finished piece on a kitchen scale before choosing hardware, or over-rate by at least 50%.
Step 2: Match the fastener to the wall material
- Plasterboard or drywall: A single picture hook works for light frames (roughly under 5 kg). Anything heavier needs a hollow-wall anchor, either an expanding metal anchor (molly bolt), which spreads behind the board, or a self-drilling screw-in anchor, which cuts its own thread. Both spread the load wider than a nail.
- Timber studs: Screw directly into studs for the strongest hold; a stud finder locates them. A screw into a stud holds far more than any hollow-wall anchor.
- Masonry and brick: Use masonry plugs and screws. Never rely on nails alone, masonry nails can crack brick and hold poorly.
Step 3: Choose the hanger type for the frame
- Picture wire: Flexible and forgiving, but the frame tilts and the wire stretches over time. Use wire rated above the frame weight and leave a shallow V, not a deep sag.
- D-rings and a hanging cord or wire: More stable than a single central hook. Two D-rings, one on each side, distribute the load and keep the frame level.
- French cleat: The most secure option for heavy frames. One half screws to the wall (into studs where possible), the other to the frame. The frame sits flush and cannot swing.
Step 4: Over-rate, then test
Over-rate your hardware rather than match it exactly, a hook rated well above the frame's weight gives margin for settling and knocks. If unsure of the wall material, drill a small test hole in a hidden spot: fine grey powder suggests plasterboard; gritty red or brown dust suggests brick or masonry.
Bauhaus Riso Constellation - Premium Framed Poster →
Hanging Gallery Walls in Difficult Spaces: Stairs, Corners, and Small Apartments
Stairwells, corners, and small rooms break the standard rules, so adjust rather than abandon them. Pick a reference line and let the frames follow it instead of forcing a flat-wall grid onto a sloped surface.
Stairwells: follow the handrail, not the floor
On a staircase, the eye reads the diagonal of the handrail. Set frames parallel to that line, stepping upward in a consistent diagonal:
- Measure the vertical rise of the handrail over the run you want to cover (for example, a 2 m run that rises 1 m gives a 1:2 slope).
- Mark a faint pencil line on the wall parallel to the handrail at your chosen height above the treads.
- Place the centre of each frame on that line, keeping the spacing between frames identical even as the line rises.
- Keep the bottom edges of the frames parallel to the handrail, not to the floor.
Use smaller frames on a stair wall than on a flat wall, the diagonal compresses the visual space, and tight, even spacing (5-8 cm) reads better than wide gaps.
Corners: treat two walls as one arrangement
For corners, treat the two walls as one continuous arrangement with the same spacing throughout. Plan the whole layout flat on the floor, split it at the corner point, and transfer each half to its wall, the corner becomes just another gap. Avoid placing a single large frame exactly in the corner, where its depth makes it look like it is floating away from one wall.
Narrow spaces: go vertical, not horizontal
In small apartments, a single vertical column of frames uses height instead of width and works well beside a door or in a hallway. Three to five frames, all the same width or narrowing toward the top, read as deliberate rather than cramped. Centre the column on the wall segment, not the door, so it does not look like it is sliding off the edge.
Sloped ceilings and dormers
Where a ceiling slopes, do not keep a horizontal top line, it fights the slope. Align the bottom edges to a horizontal line and let the tops step down with the ceiling, keeping the arrangement grounded.
Above furniture in tight rooms
When the wall above a sofa or console is short, reduce the number of frames rather than shrinking the spacing. Two or three medium frames with generous margins read better than five small frames crammed together, aim for 60-75% of the furniture width, with 15-25 cm of clearance above it.
Troubleshooting and Correcting Common Hanging Mistakes
Most gallery wall problems have a simple fix, and you rarely need to start over.
- Frames not level: Check each frame with a spirit level after hanging. Small adhesive bumpers on the lower corners stop frames from drifting.
- Gaps look uneven: Step back three metres. If the spacing reads uneven from a distance, adjust the templates rather than the frames.
- Arrangement feels off-balance: Move the largest frame toward the visual centre and redistribute smaller frames around it.
Conclusion: A Calm Wall Starts with a Careful Plan
Getting a gallery wall right is less about decorating instinct and more about patience with a tape measure: measure the wall, set your eye-level centre point, space frames consistently, and match hardware to the wall.
At LagomDesigns, our framed minimalist prints are made to order and arrive ready to hang, with hanging hardware included and four sizes and three frame finishes to choose from.

Frequently Asked Questions
How do you space pictures on a gallery wall?
Leave 5 to 7 cm between frames for a tight, gallery-style look, or up to 10 cm if your frames are large and you want a more open feel. Measure the gaps with a ruler rather than eyeballing them, because small differences are obvious once the wall is finished. Keep the gaps consistent across the whole layout, including the space between rows. If the frames are different sizes, use the same gap and let the frame edges line up on a shared grid.
Should all pictures be hung at the same height?
Not every frame needs the same top or bottom edge, but they should relate to one shared line. The standard rule is to hang the center of the arrangement at 145 to 150 cm from the floor, which is average eye level. For a gallery wall, pick either the center point or the bottom edge as your anchor line and keep every frame aligned to it. This keeps the layout from drifting up or down as you add pieces.
What are common picture hanging mistakes?
The most common mistakes are guessing the spacing instead of measuring, hanging frames too high, and using the wrong hardware for the wall type. Another frequent error is forgetting to account for the hanging wire or hook drop, which makes the frame sit lower than planned. Skipping a paper template is also a mistake, because it is the cheapest way to test a gallery wall layout before making holes. A quick pencil mark and a level fix most of these problems.
How do I hang a gallery wall on a wall with a stud or a hollow section?
For lightweight frames under 2 kg, a pin hook or a small nail in plasterboard is usually enough. For heavier pieces, drive a screw into a stud where possible, or use a wall anchor rated for the weight. If your frame is wide and has two hanging points, place each hook 2.5 cm from the frame corners when hanging horizontally. Always check the wall type first and match the hardware to the weight, especially in rented homes where large holes are hard to repair.


