


Last Updated: October 23, 2026
Quick Summary
Plan your gallery wall on the floor before hanging anything: measure the wall, pick an anchor piece, choose a layout, and tape paper templates up for two days. Keep frames 5-8 cm apart at a 145-152 cm center height, and size the group to about two-thirds of the furniture below it.
- A wall narrower than about 60 cm (24 in) suits a vertical column or corner cluster.
- Keep 15-25 cm (6-10 in) between the bottom frame and a sofa back.
- Leave at least one wall mostly bare so a small room doesn't feel cramped.
- Adhesive strip hooks work best for lightweight frames under about 2 kg.
- Hang the anchor piece first, level it, then work outward.
Table of Contents
- Start With a Plan: How to Plan a Gallery Wall Before You Hang Anything
- Gallery Wall Layout Ideas That Work in Small Apartments
- Gallery Wall Spacing: The Measurements That Keep It Balanced
- Renter-Friendly Wall Art Hanging Methods That Protect Your Walls
- Step-by-Step: How to Arrange a Gallery Wall in a Small Apartment
- Arranging a Gallery Wall Above a Sofa, Dining Nook, or Hallway
- Mistakes to Avoid When Hanging a Gallery Wall in a Small Space
- Conclusion
- Frequently Asked Questions
Start With a Plan: How to Plan a Gallery Wall Before You Hang Anything
The most common mistake in small apartments isn't choosing the wrong art. It's picking up a hammer too soon. Learning how to arrange a gallery wall in small apartments starts on the floor, not on the wall.
Here's the planning sequence that prevents most problems:
- Measure the wall. Note the width, and mark where furniture sits.
- Pick the anchor. Choose the largest piece or the focal point first.
- Choose a layout. Decide the shape before choosing frame sizes.
- Cut paper templates. Trace each frame onto paper and tape them up.
- Live with it for two days. Adjust before you commit.
That last step costs nothing and saves patched walls. The American Institute of Architects notes that good interior planning starts with the room's constraints, not its possibilities. Small apartments have more constraints than most.
Gallery Wall Layout Ideas That Work in Small Apartments
The best gallery wall layout ideas for small apartments share one trait: they grow upward, not outward. Here are five layouts with the dimensions that make them work.
The vertical column. Three or four frames stacked in a single line, each 20-30 cm (8-12 in) wide, with 5-8 cm (2-3 in) between frames. Total height lands around 90-120 cm (36-48 in). This suits the strip of wall beside a door, between two windows, or on a hallway return wall, spaces 30-40 cm (12-16 in) wide that can't take a horizontal group. Center the column on the room's eye-level line.
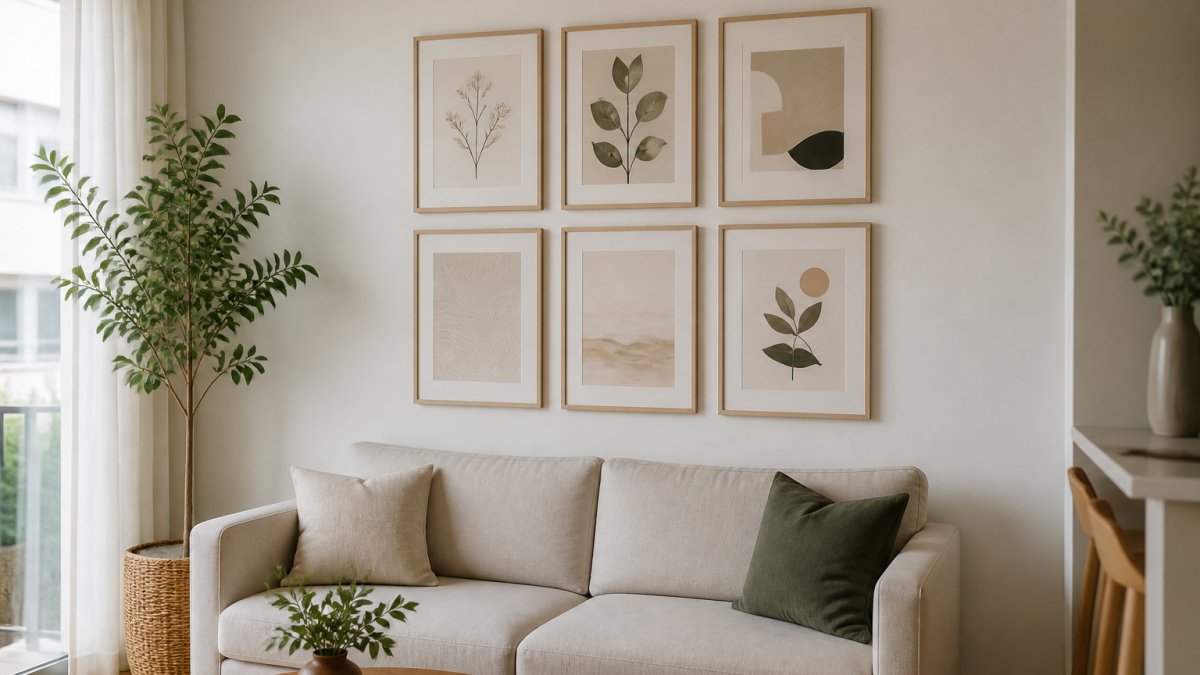
The symmetrical grid. Two rows of three matching frames, or three rows of two. Keep each frame 20-30 cm (8-12 in) and the whole grid under about 90 cm (36 in) wide so it doesn't overpower a compact sofa. Identical gaps make it the easiest layout to measure and the most forgiving for beginners; it suits the wall above a two-seater sofa or a low sideboard.
The anchor-and-satellites. One large piece, 50-70 cm (20-28 in) on its longest side, with two to four smaller prints (20-30 cm / 8-12 in) around it. The anchor sits at center height, the satellites 5-8 cm (2-3 in) away. This fixes odd-shaped wall space: an alcove, a wall broken by a radiator, or a corner where a grid would look stranded.
The shelf-led wall. A narrow picture ledge, commonly 60-120 cm (24-47 in) long and 5-8 cm (2-3 in) deep, with frames resting on it rather than hanging.
The corner cluster. A tight group on one section of wall, leaving the rest blank.
How to choose between them. Match the layout to the wall's proportions, not a photo you liked online.
For a cohesive look in a small room, keep the frame finishes to one or two. Our Neutral Shapes Minimalist Wall Art works well as a grid centerpiece because its soft tones repeat without competing.

Gallery Wall Spacing: The Measurements That Keep It Balanced
Gallery wall spacing comes down to a handful of numbers.
| Measurement | Rule | Why It Matters |
|---|---|---|
| Space between frames | 5-8 cm (2-3 inches) | Tighter reads as one unit; wider reads as separate pieces |
| Center height | 145-152 cm (57-60 inches) from the floor | Standard eye level for most viewers |
| Frame to furniture | 15-25 cm (6-10 inches) above a sofa back | Keeps the group connected to the furniture |
| Group width vs. furniture | About two-thirds of the furniture width | Prevents the art from looking stranded or oversized |
| Group width vs. wall | Leave 15-20 cm (6-8 in) of wall on each side | Keeps the group from crowding door frames and corners |
| Margin below ceiling | At least 15 cm (6 in) | Stops the top row from feeling pinched |
Treat the whole arrangement as one large shape: the outer edges should sit a consistent distance from nearby walls, door frames, and ceiling lines.
Scale rules for small rooms. The art group should cover about two-thirds of the width of the furniture below it.
Narrow walls and hallways. On a wall narrower than about 90 cm (36 in), the two-thirds rule doesn't apply, there's no furniture to relate to.
Walls interrupted by doors, windows, or radiators. Measure the solid section of wall, not the whole wall.
Renter-Friendly Wall Art Hanging Methods That Protect Your Walls
Renter-friendly wall art hanging starts with one question: how much weight, and for how long? Small apartments often mean lease terms, deposit protection, and walls you can't drill.
These methods work without leaving damage:
Bauhaus Riso Constellation - Premium Framed Poster →
- Adhesive strip hooks. Best for lightweight frames under about 2 kg. Clean the wall first, press firmly, and wait an hour before hanging.
- Picture ledges. A single screwed-in shelf holds several frames and lets you swap art freely. One set of holes, many arrangements.
- Leaning arrangements. Frames resting on a sideboard, mantel, or floor. Zero wall damage and easy to restyle.
- Tension rods. A rod between two walls or inside a deep alcove can support lightweight frames on clips.
Check the tenant rights guidance from your local housing authority before assuming a clause bans all fixings. Many standard tenancy agreements permit small picture hooks as long as holes are filled at the end of the term.
Weight matters more than method. A framed print with glass and a solid wood frame can be heavier than it looks.
Step-by-Step: How to Arrange a Gallery Wall in a Small Apartment
Here is the full process, in order. Set aside an afternoon for five to seven frames.
What you'll need: measuring tape, pencil, painter's tape, paper, scissors, a spirit level, and your chosen hanging hardware.
- Measure the wall and mark the boundaries with painter's tape.
- Lay the frames on the floor in your chosen layout and adjust until balanced, the fastest way to test ideas.
- Trace each frame onto paper and cut out the templates.
- Tape the templates to the wall using your center-height line, then check from the doorway.
- Mark the hanging points on the templates and remove them one at a time as you hang.
- Hang the anchor piece first, level it, then work outward.
- Check spacing as you go with your tape measure, not by eye.
- Fill and touch up any mistakes at the end, not during.
Expected result: a level, evenly spaced group at a consistent height that relates to the furniture below it.
Made-to-order framing removes one variable from this process. Every LagomDesigns piece arrives professionally framed and ready to hang, with hardware included, so the frame sizes you planned with are the frame sizes you receive.
Arranging a Gallery Wall Above a Sofa, Dining Nook, or Hallway
Each spot in a small apartment asks something different of the arrangement.
Above a sofa. Keep the bottom edge 15-25 cm above the sofa back and match the group's width to roughly two-thirds of the sofa.
In a dining nook. Center the group on the table, not the wall, so it reads correctly from where people sit.
In a hallway. A narrow gallery corridor works best with a single row at eye level, or a vertical column if the wall is short.
Our Gradient Wall Art suits hallway and nook walls where a soft focal point helps without adding visual noise. For a home office, the Abstract Shapes Minimalist Wall Art adds structure without clutter.


Mistakes to Avoid When Hanging a Gallery Wall in a Small Space
Small rooms punish small errors. These are the ones we see most often.
- Hanging too high. Art drifts upward over time. Anchor everything to the same center line and check with a level.
- Spacing frames too far apart. In a small room, wide gaps break the group into unrelated pieces.
- Mixing too many frame styles. Three finishes in one small arrangement reads as clutter, not curation.
- Ignoring the furniture below. A group that doesn't relate to the sofa or table looks like it's floating.
- Skipping the template stage. Eyeballing leads to extra holes and patched paint.
- Overfilling the wall. A little blank space makes the art look more deliberate, not less.
A common mistake is buying frames first and art second. Plan the layout and sizes first, then order pieces that fit the plan.
Conclusion
The hard part of a small-apartment gallery wall isn't hanging. It's restraint: fewer pieces, tighter spacing, and one clear center line. Get those right and the room feels calmer, not busier.
LagomDesigns makes that easier. Our framed minimalist prints arrive professionally framed and ready to hang, in four sizes and three frame finishes, with museum-quality matte paper and hardware included. Every piece is made to order, so your gallery wall is built around your space rather than squeezed into it.
Search our store to find the pieces that fit your plan.
Frequently Asked Questions
How many frames should you use on a small gallery wall?
Three to six frames is the sweet spot for a small apartment wall. An odd number like three or five creates visual balance, and sticking to two or three frame sizes keeps the gallery wall cohesive. If you are working with a narrow wall, a single vertical column of three frames fills the height without crowding the width. Leave at least 5 cm (2 inches) of breathing room between frames and 15-20 cm (6-8 inches) above furniture so the arrangement does not feel cramped.
How much space should you leave between gallery wall frames?
Keep gallery wall spacing between 5 cm and 7.5 cm (2 to 3 inches) for a tight, cohesive look, or up to 10 cm (4 inches) if you want a looser feel. Consistent spacing matters more than the exact number. Measure once, then use a template or paper cutouts to repeat that gap across every frame. In a small apartment, tighter spacing makes the arrangement read as one unit rather than scattered pieces, which helps a compact wall feel intentional.
How can renters hang a gallery wall without damaging the walls?
Renter-friendly wall art hanging starts with adhesive strips rated for the frame's weight, which remove cleanly without leaving holes. For heavier framed prints, use small pin nails and fill the holes with spackle before you move out. Avoid adhesive strips on textured, freshly painted, or wallpapered surfaces since they can pull the finish. Always check your lease first, and test one strip in a hidden corner before committing to a full gallery wall.
How high should a gallery wall be hung?
Hang the centre of your gallery wall at eye level, roughly 145 cm (57 inches) from the floor. This is the standard museums use and it keeps the arrangement comfortable to view from standing height. If the wall sits above a sofa, keep the bottom row 15-20 cm (6-8 inches) above the sofa back. In a small apartment, erring slightly lower makes the ceiling feel taller and the room more grounded.


