


Table of Contents
- What You'll Need to Frame Art Prints
- Measuring Your Print and Selecting the Best Frame for Art Prints
- How to Mat and Frame Art Prints
- How to Frame a Print Without Damaging It
- Archival Framing for Art Prints
- Step-by-Step Assembly and Hanging
- Common Mistakes to Avoid
- Frequently Asked Questions
Last Updated: October 11, 2026
What You'll Need to Frame Art Prints
Framing art prints professionally requires the right materials: frame, mat board, backing board, mounting supplies, and protective glass or acrylic. A cutting mat, ruler, and sharp utility knife are essential for precision work.
Invest in quality tools: a metal straightedge prevents slips, and a mat cutter ensures clean openings. Use archival tape, acid-free adhesive, and mounting corners to protect artwork from deterioration.
Here's what to gather before starting:
- Wooden or metal frame (pre-made or custom)
- Mat board (acid-free, museum-quality)
- Backing board (acid-free cardboard)
- Glass or acrylic glazing
- Mounting materials (archival tape, mounting corners, or self-adhesive board)
- Ruler and cutting mat
- Sharp utility knife or mat cutter
- Clean, lint-free cloth
- Hanging hardware
Archival materials are essential, cheap adhesives and acidic boards yellow over time and damage prints permanently.
Measuring Your Print and Selecting the Best Frame for Art Prints
Accurate measurements are critical. Measure your print's width and height using a ruler and record dimensions in both inches and millimeters, frame shops work in precise units, and rounding can cause gaps or tight fits.
Print-Specific Framing Decisions
Paper Prints (Inkjet, Giclée, Lithograph) Paper prints benefit from a mat, which protects from glass contact and prevents condensation damage. Standard mat borders range from 1.5 to 3 inches: larger prints (18x24+) use 2.5-3 inches; small prints (8x10) use 1.5-2 inches.

Photographs (Prints on Photographic Paper) Photographs require extra care due to moisture and light sensitivity. Always use a mat to create an air gap. Use archival mounting corners only, never tape or adhesive.
Canvas Prints Canvas prints frame directly into a stretcher frame or shadow box without mat or glazing. Ensure frame depth accommodates canvas thickness (0.75-1.5 inches). Avoid direct sunlight and high-humidity areas.
Oversized Prints (Larger Than 24x36 Inches) Oversized prints (larger than 40x60 inches) require custom framing and reinforced hardware. Budget $200-$500+ for a 30x40 inch frame with archival materials. Custom framing is worth the investment for long-term artwork; simple ready-made frames suit temporary displays.
Ready-Made Versus Custom Framing
Ready-made frames cost $20-$100 in standard sizes (8x10, 11x14, 16x20, 24x36 inches). Use them if your print fits within 0.25 inches of a standard size.
Custom framing costs $80-$300+ and is worth the investment for odd-sized prints, valuable artwork, specific mat colors or styles, or archival-grade preservation.
Measurement Workflow and Troubleshooting Non-Standard Sizes
Follow this workflow: measure print dimensions twice, decide on mat use, choose mat border width (1.5-3 inches), calculate frame opening size, check standard frame fit, decide on custom framing or cropping, choose frame style, and verify frame depth.
If your print is slightly smaller than standard (e.g., 7.5x9.5 inches), a wider mat can fill the gap. If larger than standard, custom framing is necessary unless you crop the image.
Odd aspect ratios rarely fit standard frames. Custom framing is necessary, or check local frame shops for panoramic or specialty sizes.
How to Mat and Frame Art Prints
Matting and framing art prints requires patience and precision. The mat protects your print from glass contact and creates visual breathing room.
Choosing Mat Width and Color
Mat width depends on print size: small prints (8x10) use 1.5-2 inches; larger prints (18x24+) use 2.5-3 inches. A wider mat creates a gallery-like feel.
White and cream mats work with nearly everything. Avoid colored mats unless your print has strong color elements. Match mat to frame for cohesion.
Cutting the Mat Opening
Mark opening dimensions on the mat back with a pencil. Use a metal straightedge and sharp utility knife or mat cutter. Cut slowly with a single firm pass from the back to keep tears hidden. For expensive artwork, frame shops offer mat-cutting services for $10-30.
How to Frame a Print Without Damaging It
Handle artwork with clean, dry hands only, skin oils stain paper permanently. Wear cotton gloves when framing valuable prints.
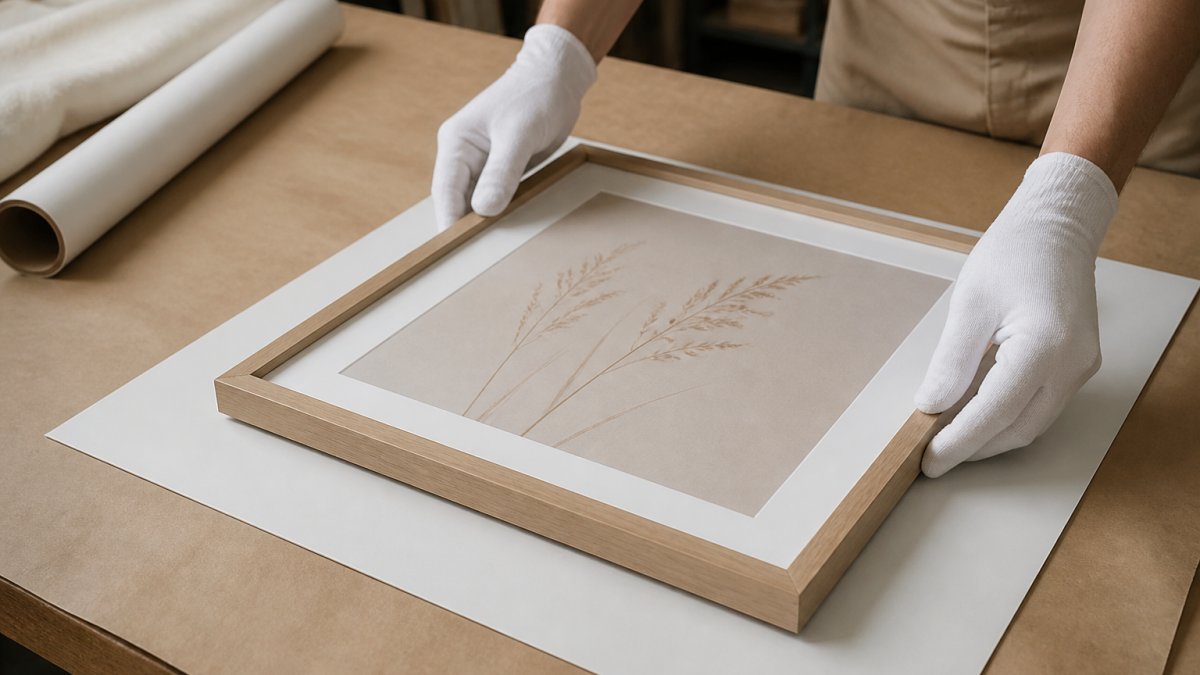
Never use tape directly on your print, it damages paper fibers. Use archival mounting corners or self-adhesive mounting board instead.
Position the print flat against the backing board with no wrinkles. If the print curls, place a heavy book on top for 24 hours to flatten it naturally.
Archival Framing for Art Prints
Archival framing ensures artwork lasts decades without fading. Use acid-free mat board and backing, acidic materials yellow and become brittle. UV-protective glass or acrylic blocks sunlight. Store framed prints away from direct sunlight, heat, and humidity fluctuations. Avoid basements and attics.
| Material | Standard | Archival | Lifespan Difference |
|---|---|---|---|
| Mat board | Regular cardboard | Acid-free, lignin-free | 20-30 years vs. 100+ years |
| Adhesive | Regular tape | Archival mounting corners | Print survives vs. tape residue damage |
| Glazing | Regular glass | UV-protective acrylic | Colors fade in 10-15 years vs. 50+ years |
| Backing | Any cardboard | Acid-free board | Yellows and deteriorates vs. stays neutral |
Step-by-Step Assembly and Hanging
Lay all components on a clean surface. Start with backing board, then mat, then print centered and secured with archival mounting corners. Add clean glass or acrylic, seal the back with kraft paper, and insert into frame. For a 24x36 inch horizontal frame, place mounting hooks 1 inch from each corner to distribute weight evenly.
Common Mistakes to Avoid
Framing mistakes are often irreversible. Learning to recognize and prevent them saves time, money, and frustration.
Bauhaus Riso Constellation - Premium Framed Poster →
Adhesive and Mounting Errors
The biggest mistake is using regular tape on artwork. It damages paper fibers, leaves sticky residue that attracts dust, and is nearly impossible to remove without tearing the print. Never use masking tape, duct tape, or clear packing tape on any print you care about.
Instead, use archival mounting corners (small triangular pockets that hold the print without adhesive contact) or self-adhesive mounting board. Archival mounting corners cost a few dollars more and protect your print completely. If you must use adhesive, use only acid-free, reversible adhesive designed for archival mounting. Test it on a scrap first.
Wrinkles and Curling
Prints often arrive rolled or curled. Before framing, place flat under heavy books for 24-48 hours to flatten naturally. Do not use heat or steam. If wrinkles appear during framing, remove the print and place under weight for another 24 hours.
Dust and Debris
Dust trapped between the print and glazing is visible and looks cheap. It's also difficult to remove once the frame is sealed.
Prevention: Clean all surfaces before assembly. Wipe the glass or acrylic with a lint-free cloth. Dust the print gently with a soft brush (never touch the print surface directly). Assemble the frame in a clean, dust-free workspace. Avoid framing on carpeted floors where dust is more likely to settle.
If dust gets trapped: Do not attempt to open the frame and re-clean if it's already sealed. Instead, use a small amount of compressed air (like a camera lens blower) to gently blow dust out through any small gaps before final sealing. Once sealed, trapped dust is permanent.
Uneven Mat Borders and Misaligned Prints
A mat opening that's off-center or a print that sits crooked inside the mat destroys the professional look instantly.
Prevention: Measure and mark mat opening dimensions on the back of the mat using a pencil and ruler. Use a metal straightedge (not a plastic ruler, which can slip) and cut slowly and deliberately. A single firm pass beats multiple shallow cuts.
When positioning the print inside the mat, use small pencil marks on the mat backing to indicate where the print edges should align. Center the print carefully before securing it with mounting corners. Check alignment from the front before moving to the next step.
Slipping and Shifting
Prints can slip inside the mat or shift during assembly if mounting corners are not secure or if the frame is jostled during hanging.
Prevention: Use at least four mounting corners, one on each corner of the print. For large prints (18x24 inches or larger), consider using six mounting corners (two on each long side) for extra security. Ensure mounting corners are tight and the print cannot move side-to-side or up-and-down.
When inserting the assembled frame components into the frame, do so slowly and carefully. Do not force the sandwich into the frame. If it's too tight, remove one layer, check for debris or warping, and try again.
Glazing and Condensation Issues
Regular glass can trap moisture between the print and glass, causing mold, mildew, and water damage. This is especially common in humid climates or bathrooms.
Prevention: Always use a mat to create an air gap between the print and glazing. This allows air circulation and prevents condensation. Never mount a print directly against glass without a mat.
Choose acrylic or UV-protective glass over regular glass. Acrylic is lighter, shatter-resistant, and blocks more ultraviolet light. It's worth the extra cost for valuable prints.
Avoid hanging framed prints in high-humidity areas like bathrooms or kitchens. If you must display a print in a humid room, use acrylic glazing and ensure the frame backing is sealed to prevent moisture from entering from behind.
Frame and Mat Quality
Cheap frames and mats look flimsy and deteriorate quickly. Thin frames bend easily. Non-archival mats yellow and become brittle over time, damaging the print.
Prevention: Invest in quality materials upfront. A frame with at least 0.75-inch depth provides adequate space for mat, print, and backing without looking bulky. Choose acid-free, museum-quality mat board. The price difference between standard and archival mat board is minimal (often $5-$10 per mat), but the longevity difference is dramatic (20-30 years versus 100+ years).
For prints you plan to display long-term or gift to someone special, archival materials are non-negotiable. For temporary displays or prints you plan to replace, standard materials are acceptable.
Rushing the Process
The biggest mistake of all is rushing. Framing takes time. Hurried work shows in crooked mats, misaligned prints, and visible dust. Set aside 2-4 hours for a single frame. Work in a clean, well-lit space. Measure twice, cut once. Handle your artwork with care. Your walls will thank you.
Frequently Asked Questions
What materials do you need to frame an art print?
To frame art prints professionally, you need a frame (wood or metal), mat board (optional but recommended), backing board, glazing (glass or acrylic), mounting supplies, and hanging hardware. For archival framing, use acid-free mat board, conservation-grade backing, and UV-protective glazing. Having a mat cutter, ruler, and mounting tape designed for archival work ensures your print stays protected long-term. LagomDesigns framed prints come with all essential components included, including Acrylite front protection and hanging hardware.
Should you use a mat when framing an art print?
A mat serves two critical purposes: it creates space between your print and the glazing, preventing moisture damage and contact deterioration, and it enhances the visual presentation by adding proportion and framing the artwork. Mats also allow you to display prints of different sizes in the same frame. While not mandatory, mats are strongly recommended for fine art prints, photographs, and any piece you want to preserve long-term. Choose acid-free mat board in neutral colors that complement your print without competing for attention.
How do you keep an art print from touching the glass when framing?
A mat board creates the necessary separation between your print and glazing. Mount the print on the mat using acid-free tape or mounting corners on the backing side only, leaving the front surface visible and untouched. The mat's raised edges hold the print at least 3-5 millimetres away from the glass or acrylic, preventing contact that causes moisture buildup and image damage. For prints without a mat, use spacers or a thicker backing system to maintain clearance. This spacing is essential for archival framing and long-term print preservation.
Can you frame art prints yourself and still get a professional look?
Yes, with proper technique and quality materials, DIY framing can achieve professional results. The key is precision in measuring, using archival materials, maintaining clean hands during assembly, and securing all components firmly. Pre-made frames with included hardware simplify the process significantly. However, ready-made framed prints like those from LagomDesigns eliminate guesswork entirely, they arrive professionally assembled with museum-quality matte paper, acid-free components, and hanging hardware, ready to display immediately. This approach combines professional quality with the convenience of made-to-order customization.


